

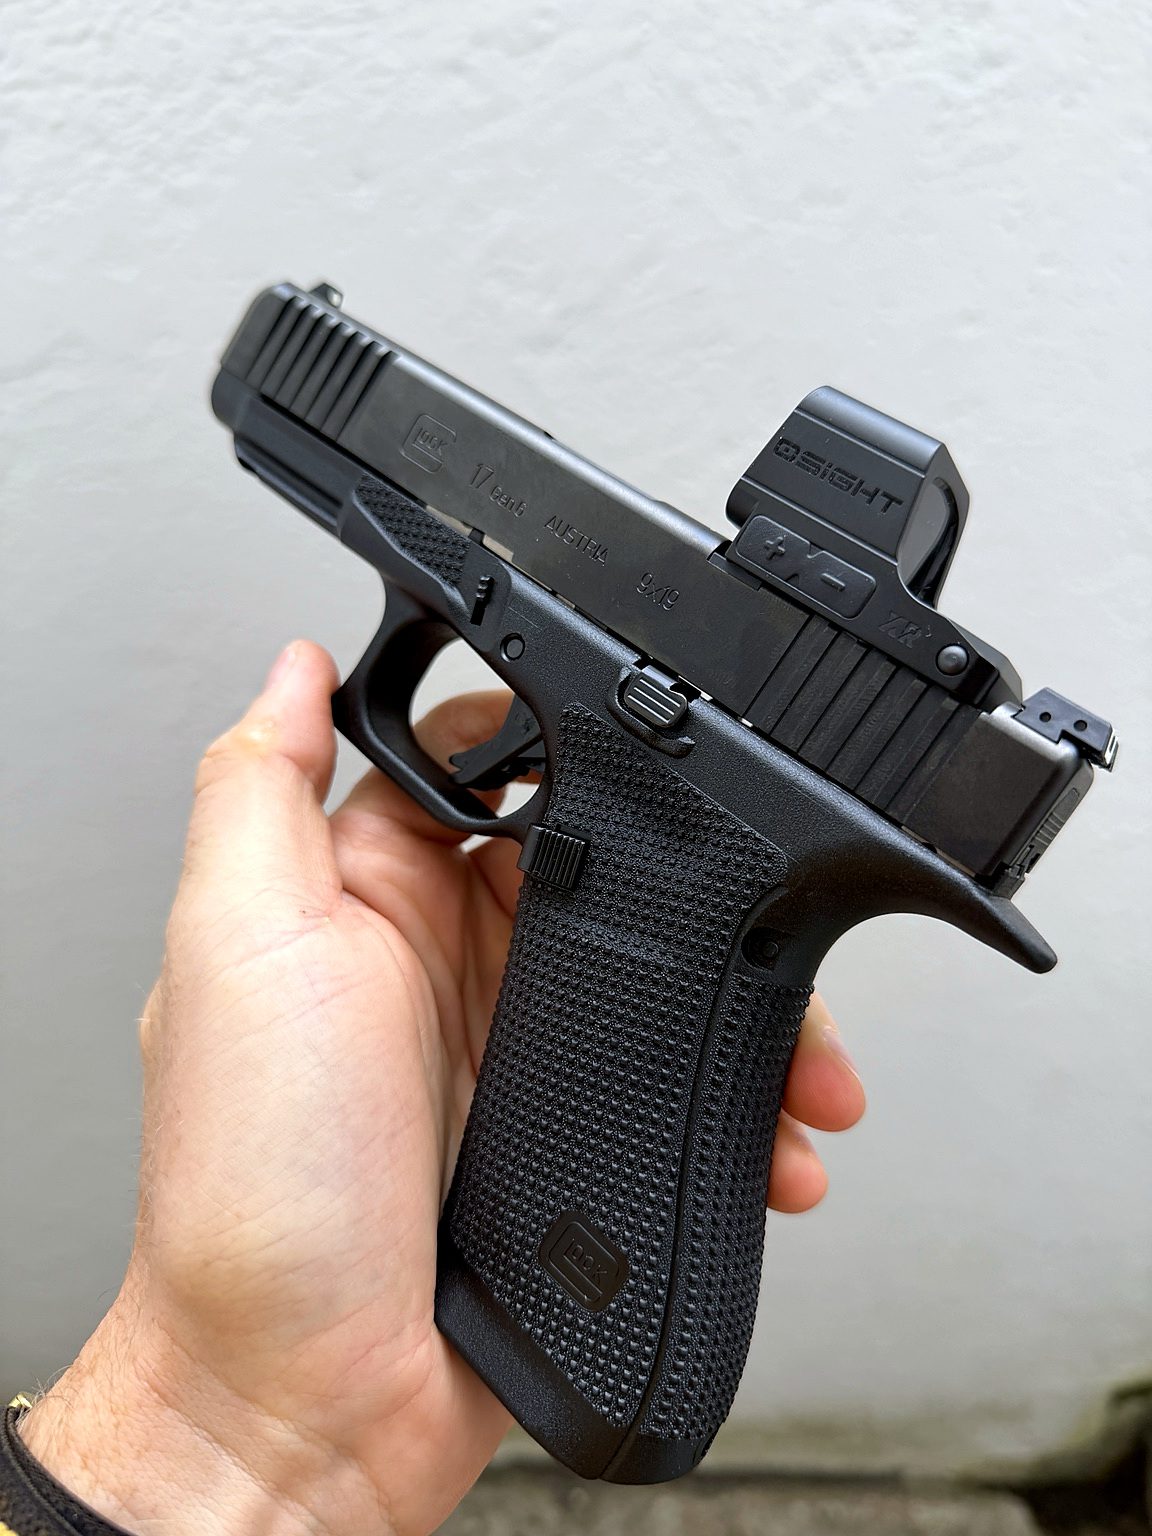
The OSIGHT XR is now mounted on my new Glock 17 Gen6 in 9 mm Luger.
Before taking this combination to the range, I wanted to take a closer look at the OSIGHT XR, its mounting system and some of the features that make this enclosed red dot particularly interesting to me.
The OSIGHT XR combines an enclosed emitter design, multiple selectable reticles, motion activation, an integrated collapsible backup rear sight and a rechargeable battery system with a magnetic charging cover.
In addition, the charging concept is particularly interesting because the optic can remain mounted on the pistol during routine charging.
For this article, however, I am concentrating primarily on the installation. I will show what comes in the box, explain the mounting interface of the Glock 17 Gen6, identify the screws I used and describe my personal procedure for securing the optic.
Finally, the actual live-fire test will follow after the installation has had sufficient time to cure.
OSIGHT XR: First Look
The OSIGHT XR is an enclosed-emitter reflex sight. Unlike an open reflex sight, the LED emitter is protected inside the housing.
One of the most interesting aspects of the XR is that OSIGHT has combined this enclosed construction with the widely established RMR footprint.
As a result, the XR can be used with mounting solutions designed around the Trijicon RMR / Holosun 407C and 507C footprint.
Another unusual feature is the power system. Instead of having to remove the optic or open a battery compartment, the XR contains an internal rechargeable battery.
Therefore, a magnetic charging cover can simply be placed over the optic while it remains installed on the pistol.
For me, that is one of the most interesting ideas behind the OSIGHT XR because once I have properly mounted and zeroed an optic, I generally prefer not to disturb the installation unnecessarily.
What Comes with the OSIGHT XR?
The OSIGHT XR arrives in a surprisingly comprehensive package.
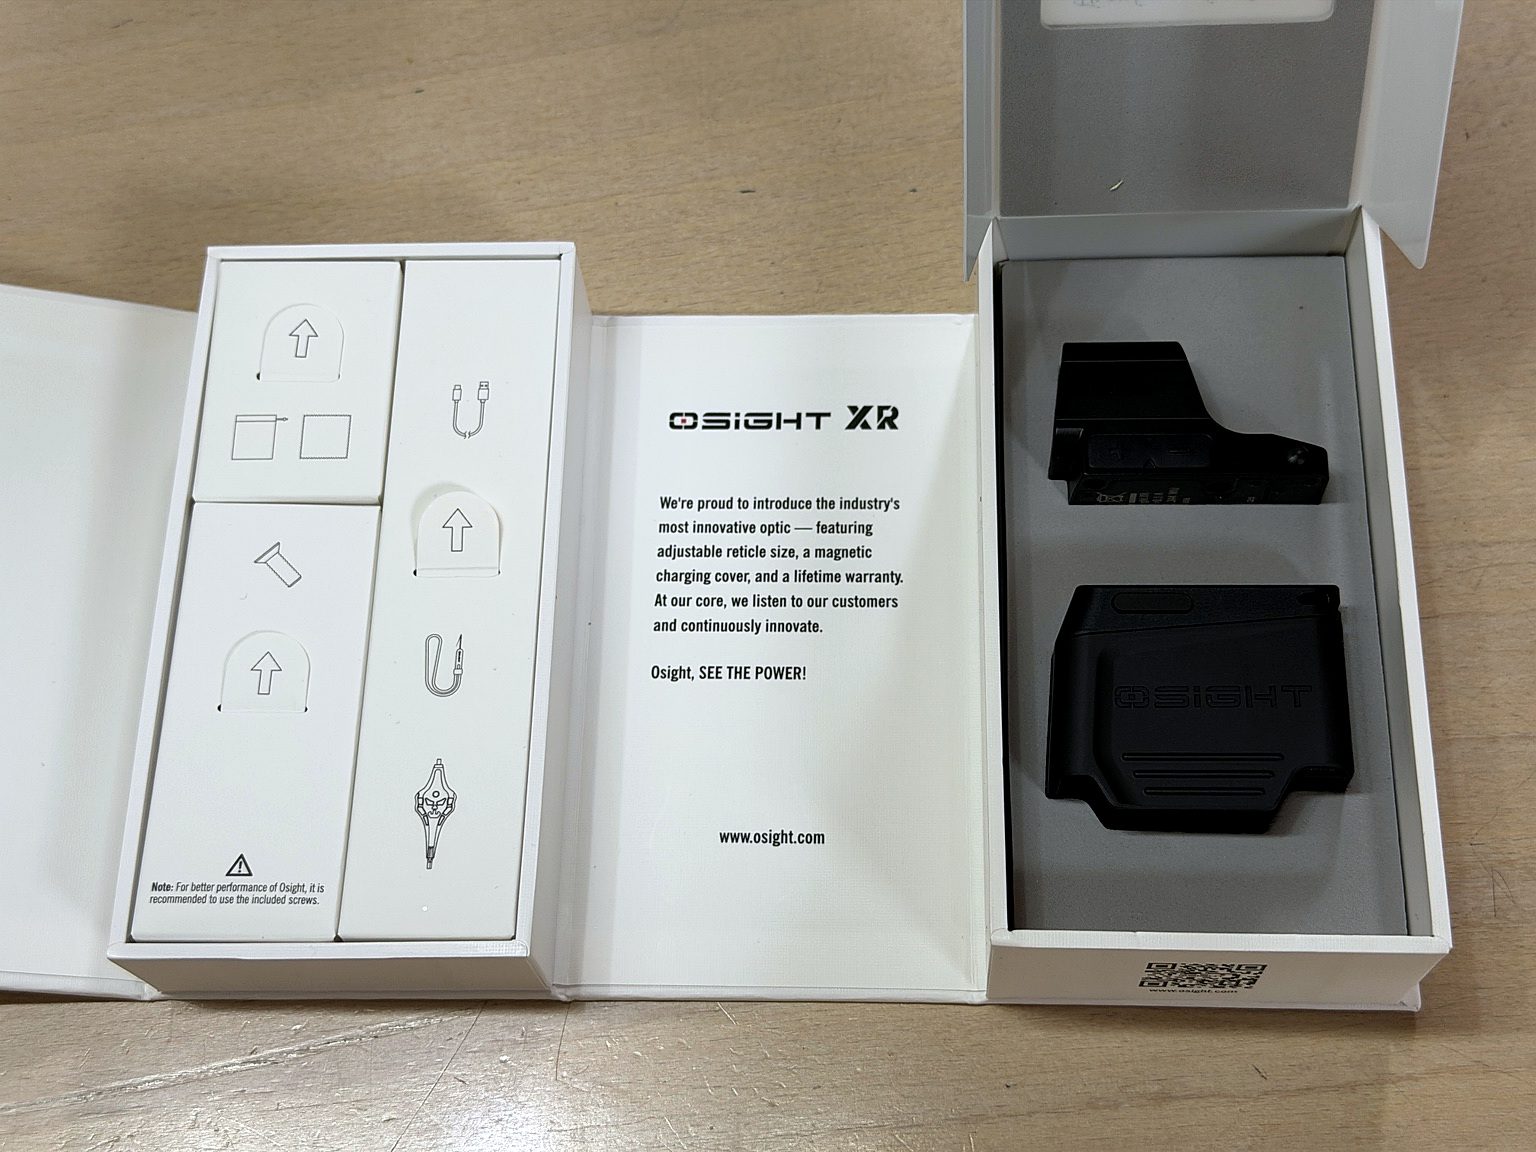
According to the manufacturer’s packing list, the package contains the following main items:
- OSIGHT XR enclosed red dot sight
- Magnetic charging cover
- USB-C charging cable
- Adjustment tool
- Screw kit and screw organiser
- Silicone lanyard
- Protective pouch
- Cleaning cloth
- User manual
- Safety information
- READ ME card
- OSIGHT sticker
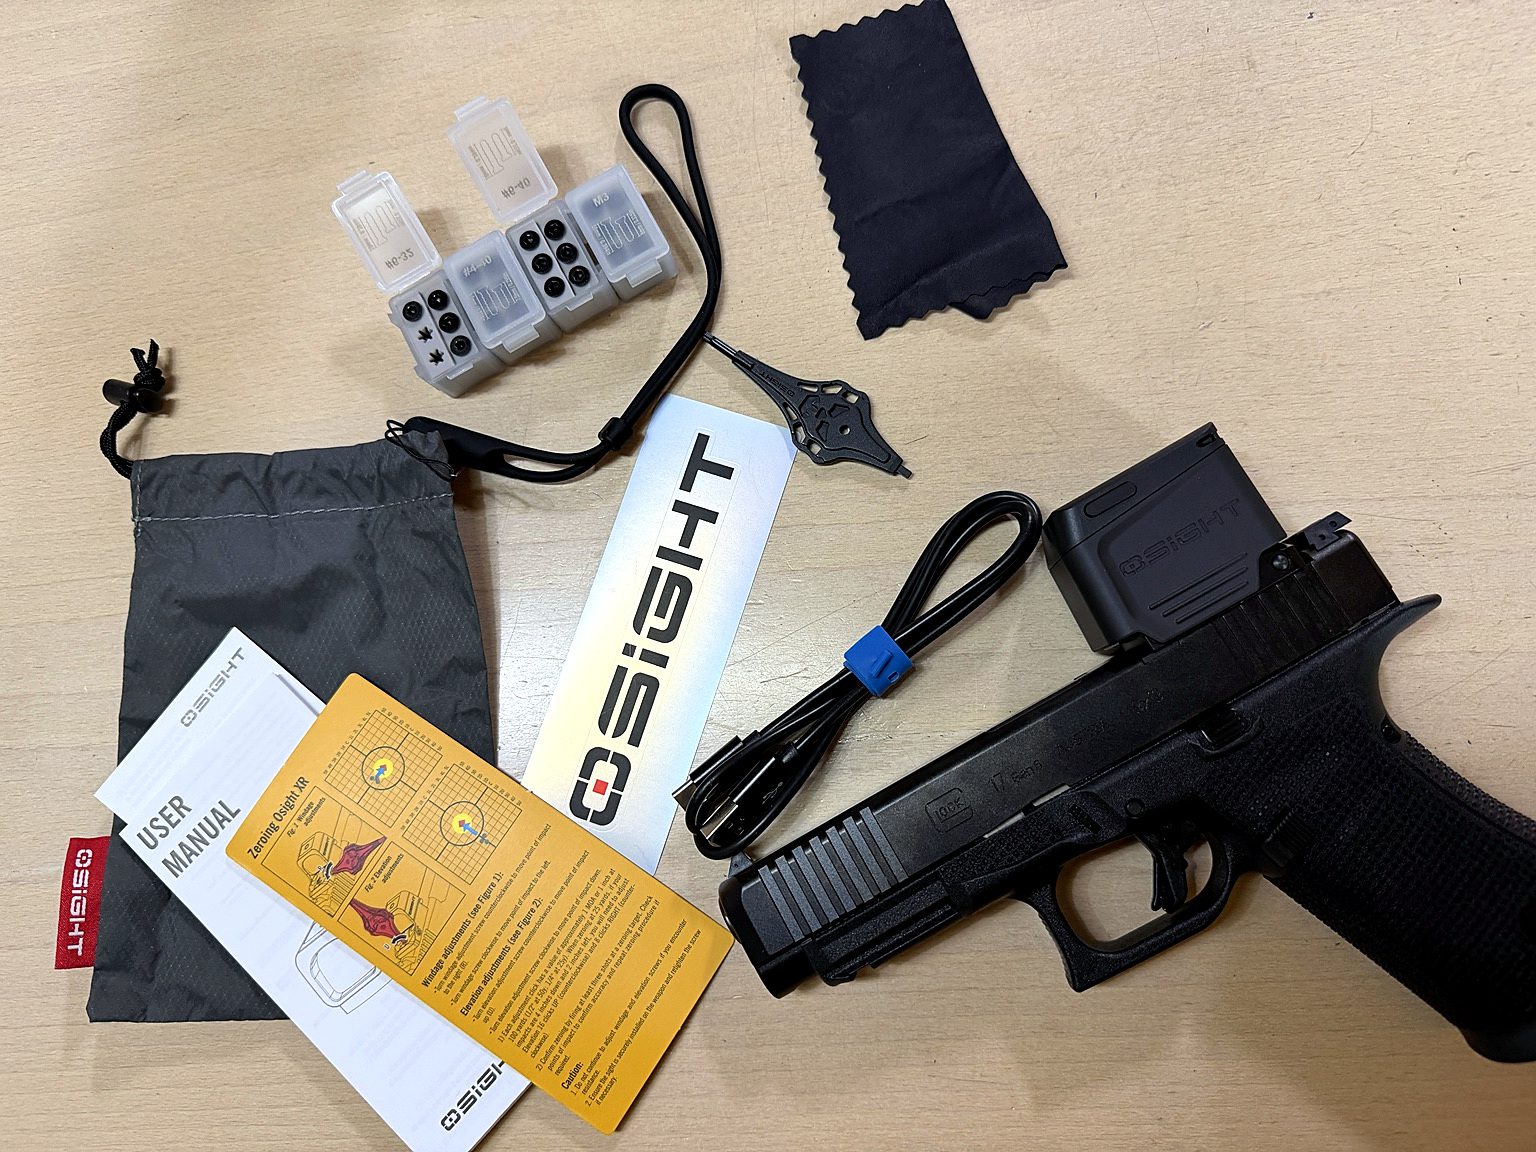
The screw kit is particularly useful because OSIGHT supplies several different screw types for different mounting systems.
#6-32 • #4-40 • #6-40 • M3
This is a small detail, but a useful one. Instead of receiving several almost identical black screws in a plastic bag, the different thread types are clearly separated.
For this reason, identifying the correct screw family is much easier before installation.
On the Glock 17 Gen6 setup shown here, one of these compartments becomes particularly important.
Glock 17 Gen6: Understanding the OSIGHT XR Optic Footprint
This is where it is important to distinguish between two different things: the footprint of the optic and the mounting system of the pistol.
The OSIGHT XR uses the RMR-pattern footprint, which is also commonly associated with optics such as the Trijicon RMR and Holosun 407C/507C.
However, the optic footprint and the pistol mounting system are not the same thing.
My Glock 17 Gen6 uses Glock’s Gen6 Optic Ready system.
Therefore, the correct factory interface is important when installing an RMR-pattern optic such as the OSIGHT XR.
The Gen6 mounting system differs from the traditional Gen4/Gen5 MOS arrangement. In this case, the corresponding factory interface is Glock OR plate 02.
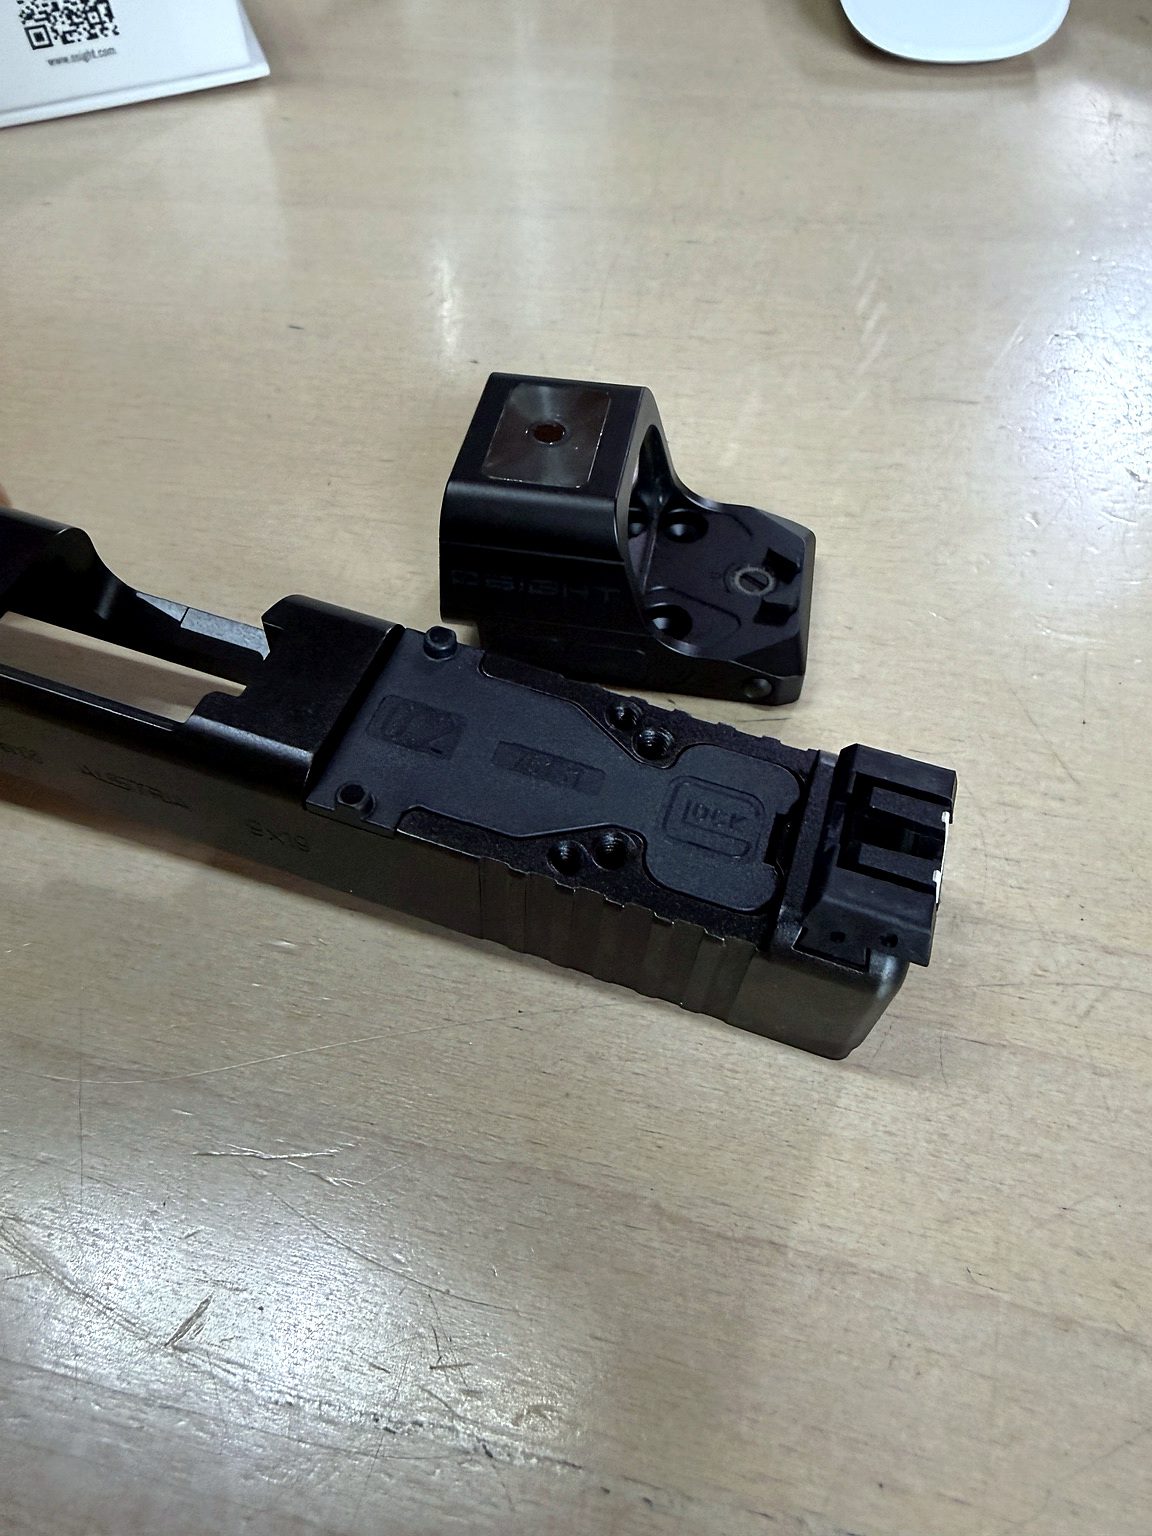
According to Glock’s documentation for the Gen6 Optic Ready adapter system, this mounting arrangement uses 6-32 UNC threads.
Fortunately, that corresponds directly with one of the screw sets supplied with the OSIGHT XR.
For me, the installation was therefore extremely straightforward.
There was no need to machine the slide and I did not need to purchase an additional aftermarket adapter plate.
Which Screws Did I Use for the OSIGHT XR?
For my installation I used two #6-32 UNC screws from the screw kit supplied with the OSIGHT XR.
Although the kit also contains #4-40, #6-40 and M3 screws, these thread types are not interchangeable.
For this reason, both the thread type and the screw length should be checked before final assembly.
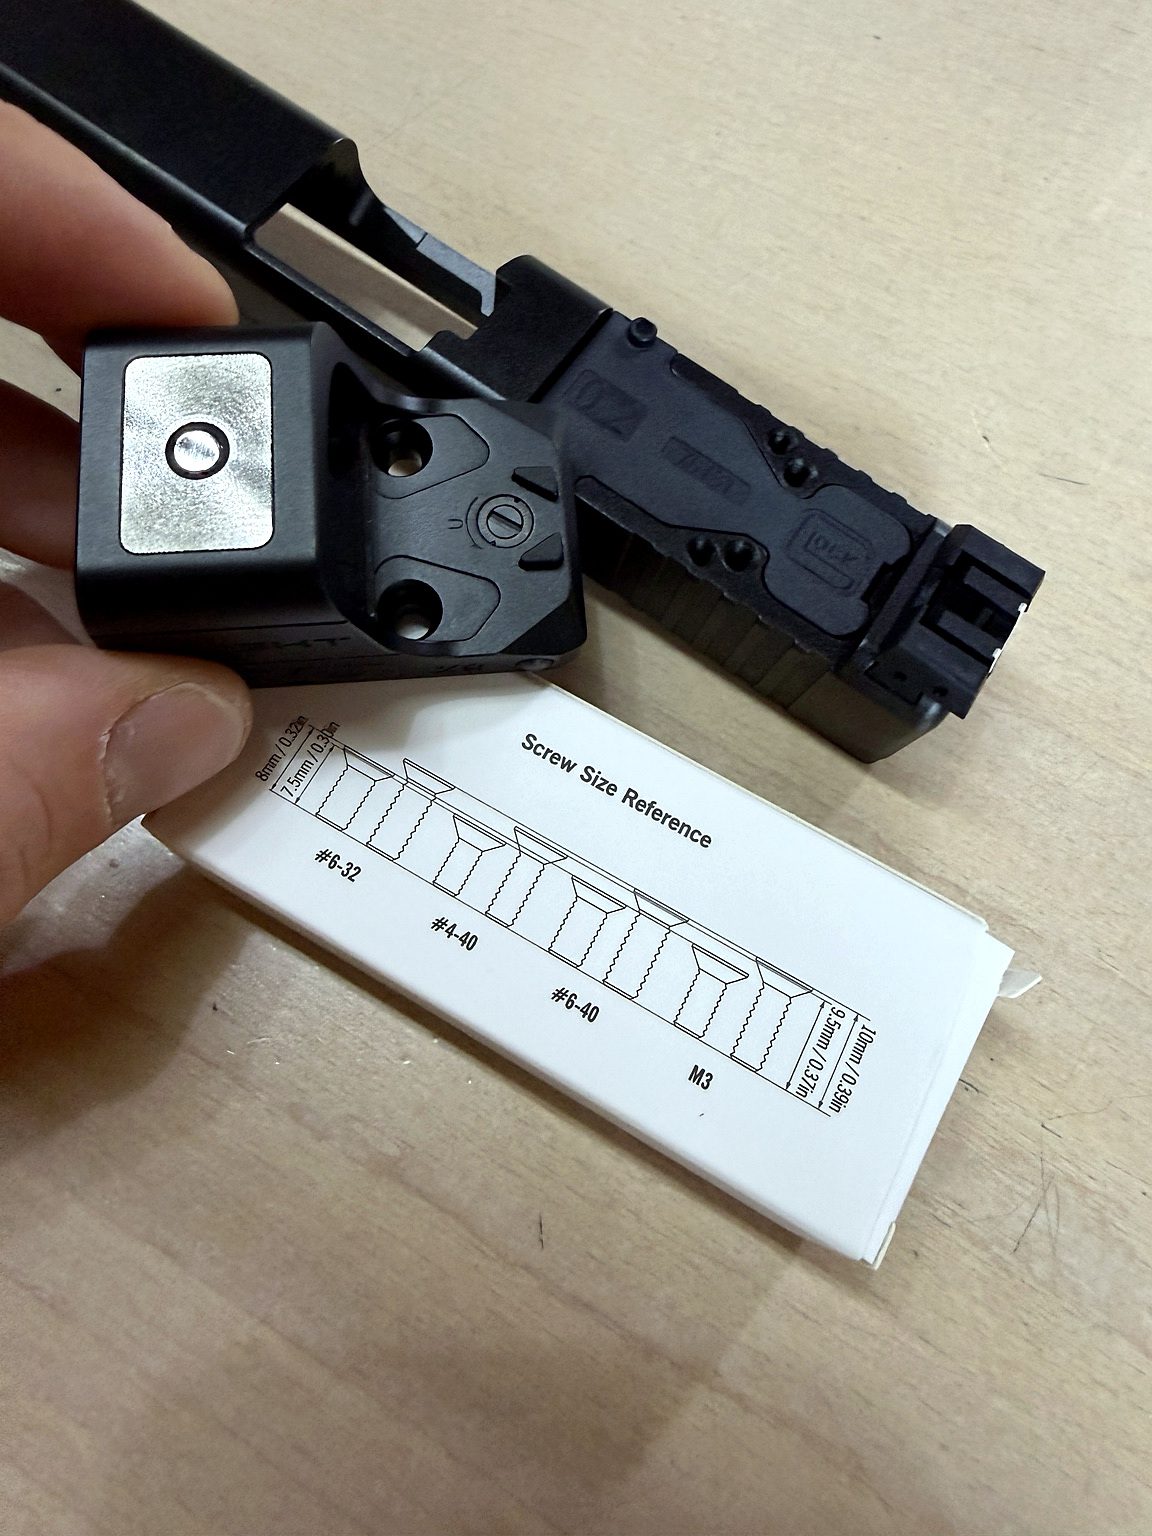
The supplied reference card makes identifying the different screw families considerably easier.
Nevertheless, the correct thread type does not automatically mean that every screw of that thread is suitable for every possible pistol and optic combination.
Thread engagement and screw length always need to be checked for the particular mounting arrangement being used.
For this installation, the relevant thread is clearly #6-32 UNC.
Installing the OSIGHT XR on the Glock 17 Gen6
Before doing any work on a firearm, I make absolutely sure that the pistol is unloaded.
First, the magazine is removed and the chamber is visually and physically checked.
Afterwards, the pistol can be prepared for the installation.
With the slide removed, the Gen6 optic interface and plate are particularly easy to see.
Next, the XR can be positioned directly over the mounting arrangement.
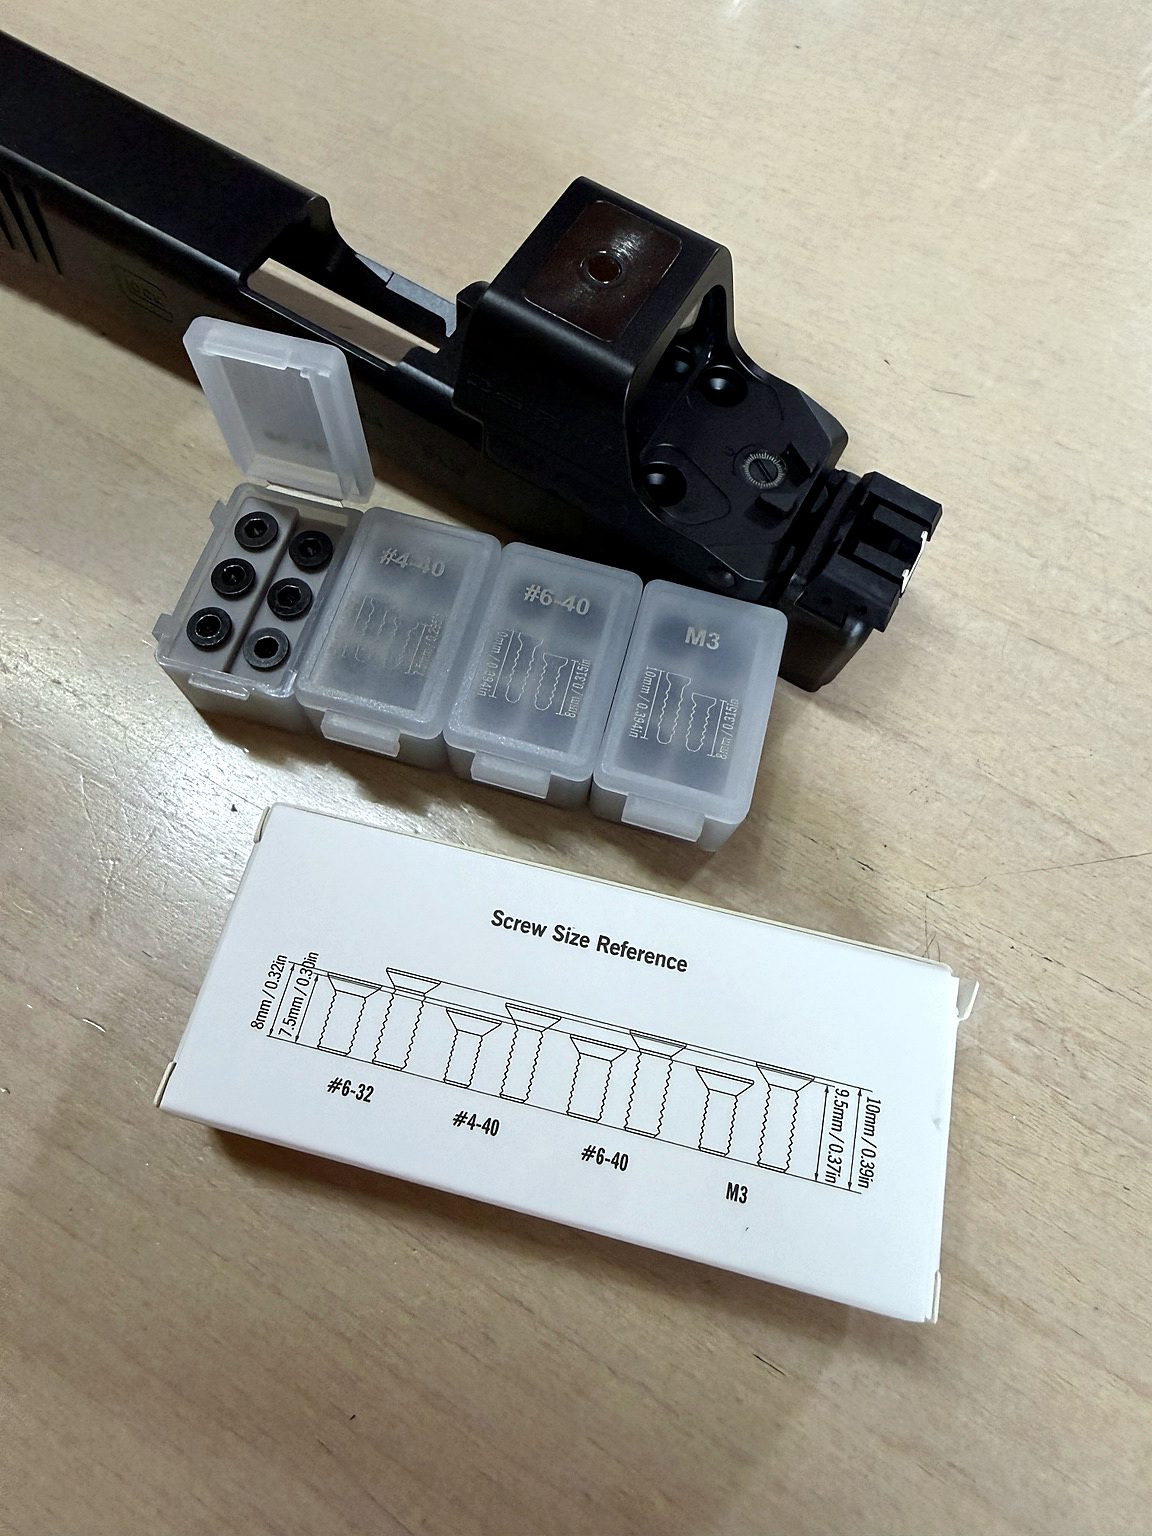
The XR seated cleanly on the Glock mounting interface and the overall installation was very easy.
In particular, this is one aspect of the new Glock Gen6 system that I appreciate.
The RMR-pattern XR and Glock’s corresponding 02 plate make for a very straightforward combination.
Once everything was correctly seated, I installed the two #6-32 screws.
My Mounting Procedure: 1.9 Nm and Removable LOCTITE
For this installation I tightened the two optic screws to:
Interestingly, OSIGHT’s published specification for the XR also gives 17 in-lb for the #6-32 mounting screws, which corresponds to approximately 1.92 Nm.
In addition, I use a removable, non-permanent LOCTITE threadlocker on the mounting screws.
However, this is my personal mounting procedure and reflects my own experience rather than a universal recommendation for every optic or mounting system.
Over the years, I have had very good results mounting pistol red dots this way. A properly prepared mounting surface, the correct screws, controlled torque and removable threadlocker have proven to be a very reliable combination for me.
At the same time, I deliberately avoid permanent threadlocker.
This way, the optic can still be removed later without turning a simple red-dot replacement into a major operation.
Why I Wait 24 Hours
Once the XR has been installed, I do not immediately take the pistol to the range.
Instead, I leave the complete installation untouched for approximately 24 hours.
This way, the threadlocker has enough time to cure before the mounting system is exposed to repeated slide movement and vibration.
Again, this is my personal procedure based on my experience mounting red-dot sights.
Of course, the exact curing instructions of the particular threadlocker being used should always be observed.
There is no reason to rush this part of the process.
The Finished OSIGHT XR Installation
Once installed, the XR sits very nicely on the Glock 17 Gen6.
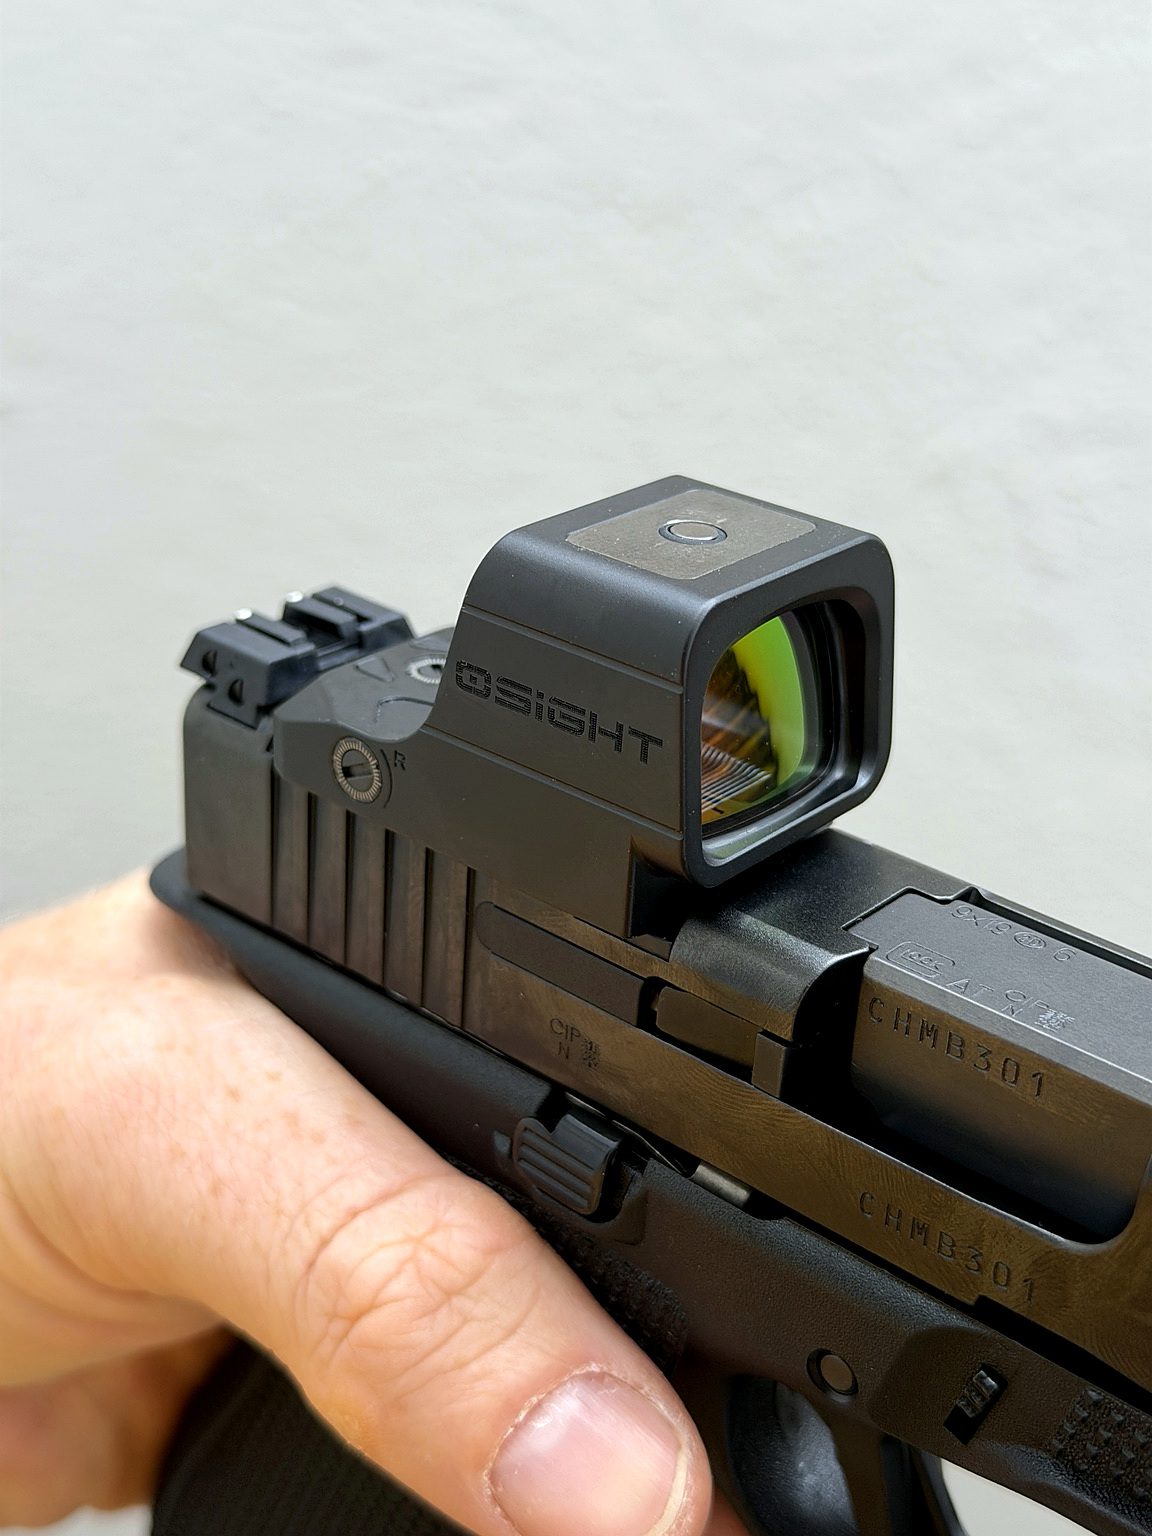
The XR housing is manufactured from 7075-T6 aluminium and uses an enclosed design.
In addition, the charging interface is immediately recognisable by the contact surface on top of the optic.
Visually, I also think the proportions work very well on the full-size Glock 17 slide.
However, appearance and actual durability are two completely different things.
A clean installation is only the beginning.
Ultimately, the range will show whether the optic maintains zero and how it behaves over a larger number of rounds.
OSIGHT XR Magnetic Charging Without Removing the Optic
This may be my favourite technical feature of the XR.
The optic contains an internal rechargeable lithium-polymer battery.
Instead of removing the sight or replacing a conventional coin cell, OSIGHT supplies a magnetic charging cover.
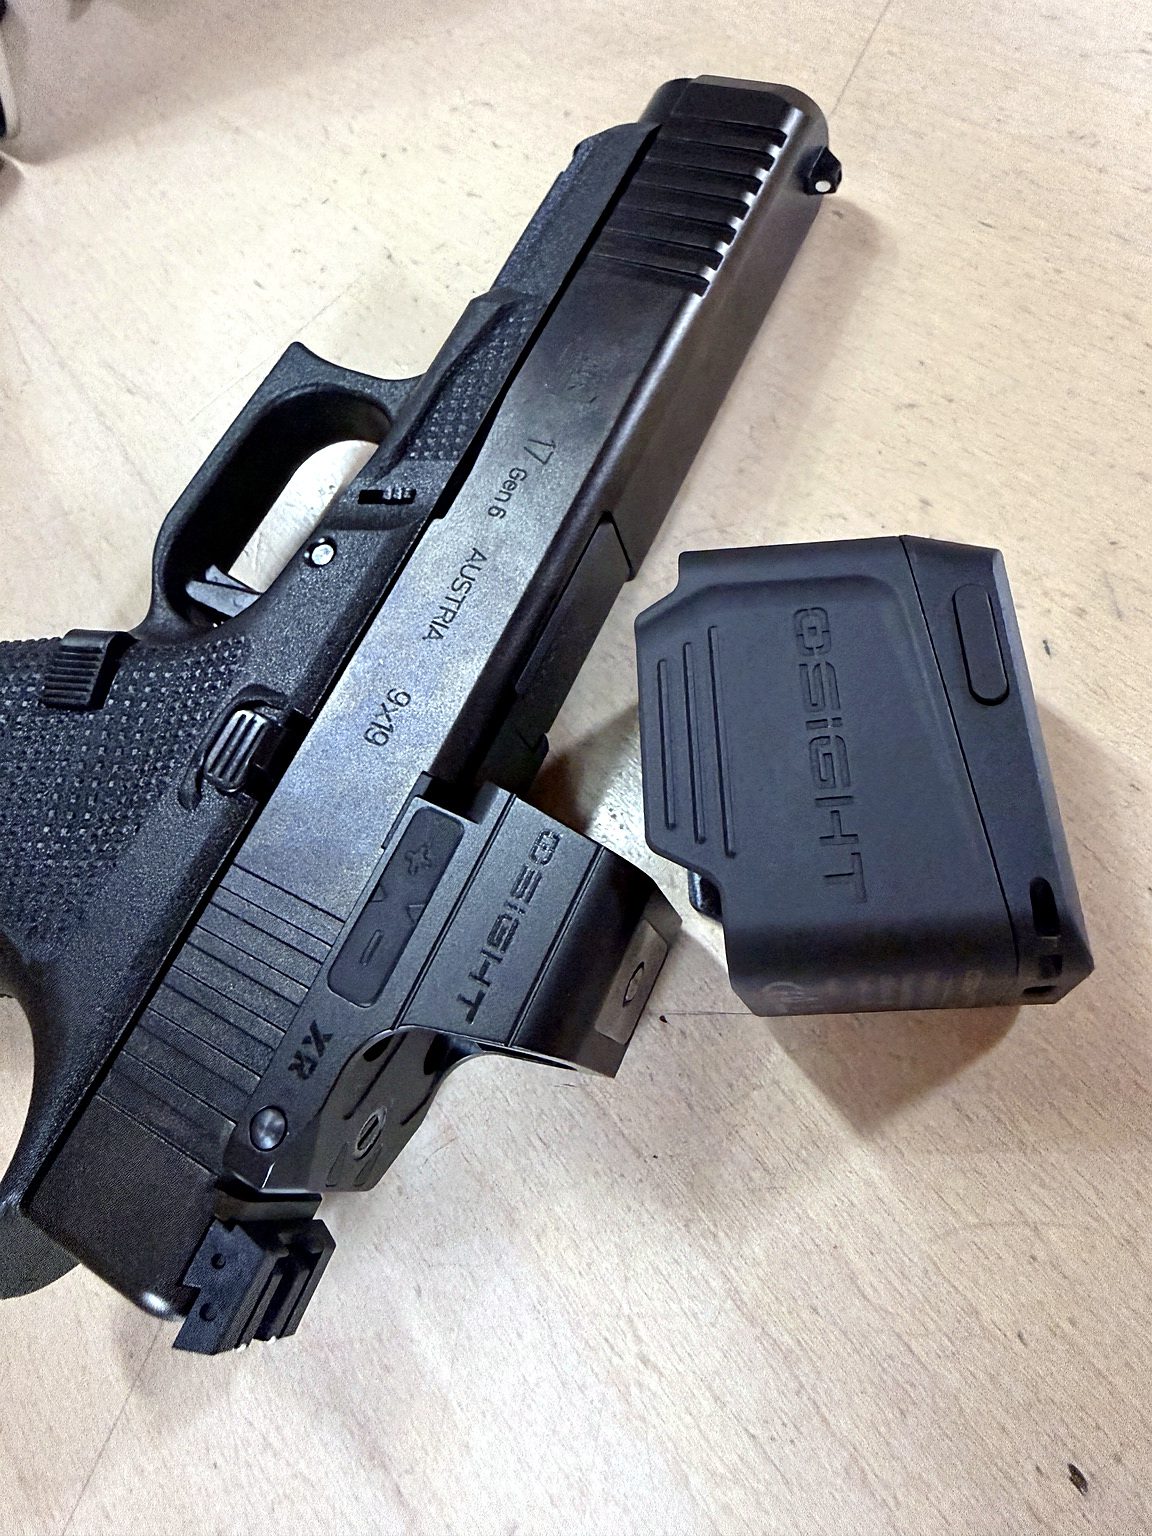
The cover simply fits over the optic and charges the internal battery while the XR remains mounted on the pistol.
Meanwhile, the charging cover itself can be recharged via USB-C.
As a result, the optic does not have to be removed from the pistol for routine charging.
Once I have mounted an optic properly, checked the mounting screws and established a zero, I prefer to leave that mechanical connection alone.
OSIGHT specifies a maximum runtime of up to 54,000 hours for the optic under defined conditions using the 2 MOA dot at brightness level 4.
Furthermore, OSIGHT specifies up to 324,000 hours of cumulative runtime when the energy available from the charging cover is included under the manufacturer’s defined test conditions.
It is important to understand the wording here: the latter figure represents cumulative operation including recharging from the cover. It does not mean that the optic operates continuously for 324,000 hours from one charge.
These are manufacturer specifications rather than figures I have independently verified.
Five Different Reticle Configurations
Another feature I want to test extensively is the Multi-Reticle System.
The XR allows me to choose between five different configurations:
- 2 MOA dot
- 6 MOA dot
- 32 MOA circle
- 2 MOA dot + 32 MOA circle
- 6 MOA dot + 32 MOA circle
This is particularly interesting for a sporting pistol.
For example, I can compare the relatively fine 2 MOA dot with the much more visible 6 MOA dot on exactly the same optic.
Therefore, I do not have to decide between separate optic versions before knowing which reticle I actually prefer.
The XR also offers 11 brightness levels, consisting of eight daylight settings and three night-vision settings.
In addition, the optic remembers the previously selected brightness level.
OSIGHT XR Motion Activation
The XR includes a motion-sensing function.
When enabled, movement can wake the optic automatically.
After approximately three minutes without movement, the optic can enter its sleep state.
As soon as movement is detected again, the sight wakes up.
For everyday use, I find this more convenient than having to remember to manually switch the sight on every time the pistol is picked up.
The brightness itself is still controlled using the buttons on the side of the optic.
The OSIGHT XR Collapsible Backup Rear Sight
One of the more unusual XR features is something OSIGHT calls the:
CBRS – Collapsible Backup Rear Sight.
The backup rear sight is integrated directly into the XR and can be deployed when required.
Because the enclosed optic itself occupies a considerable amount of space at the rear of the slide, this is an interesting design idea.
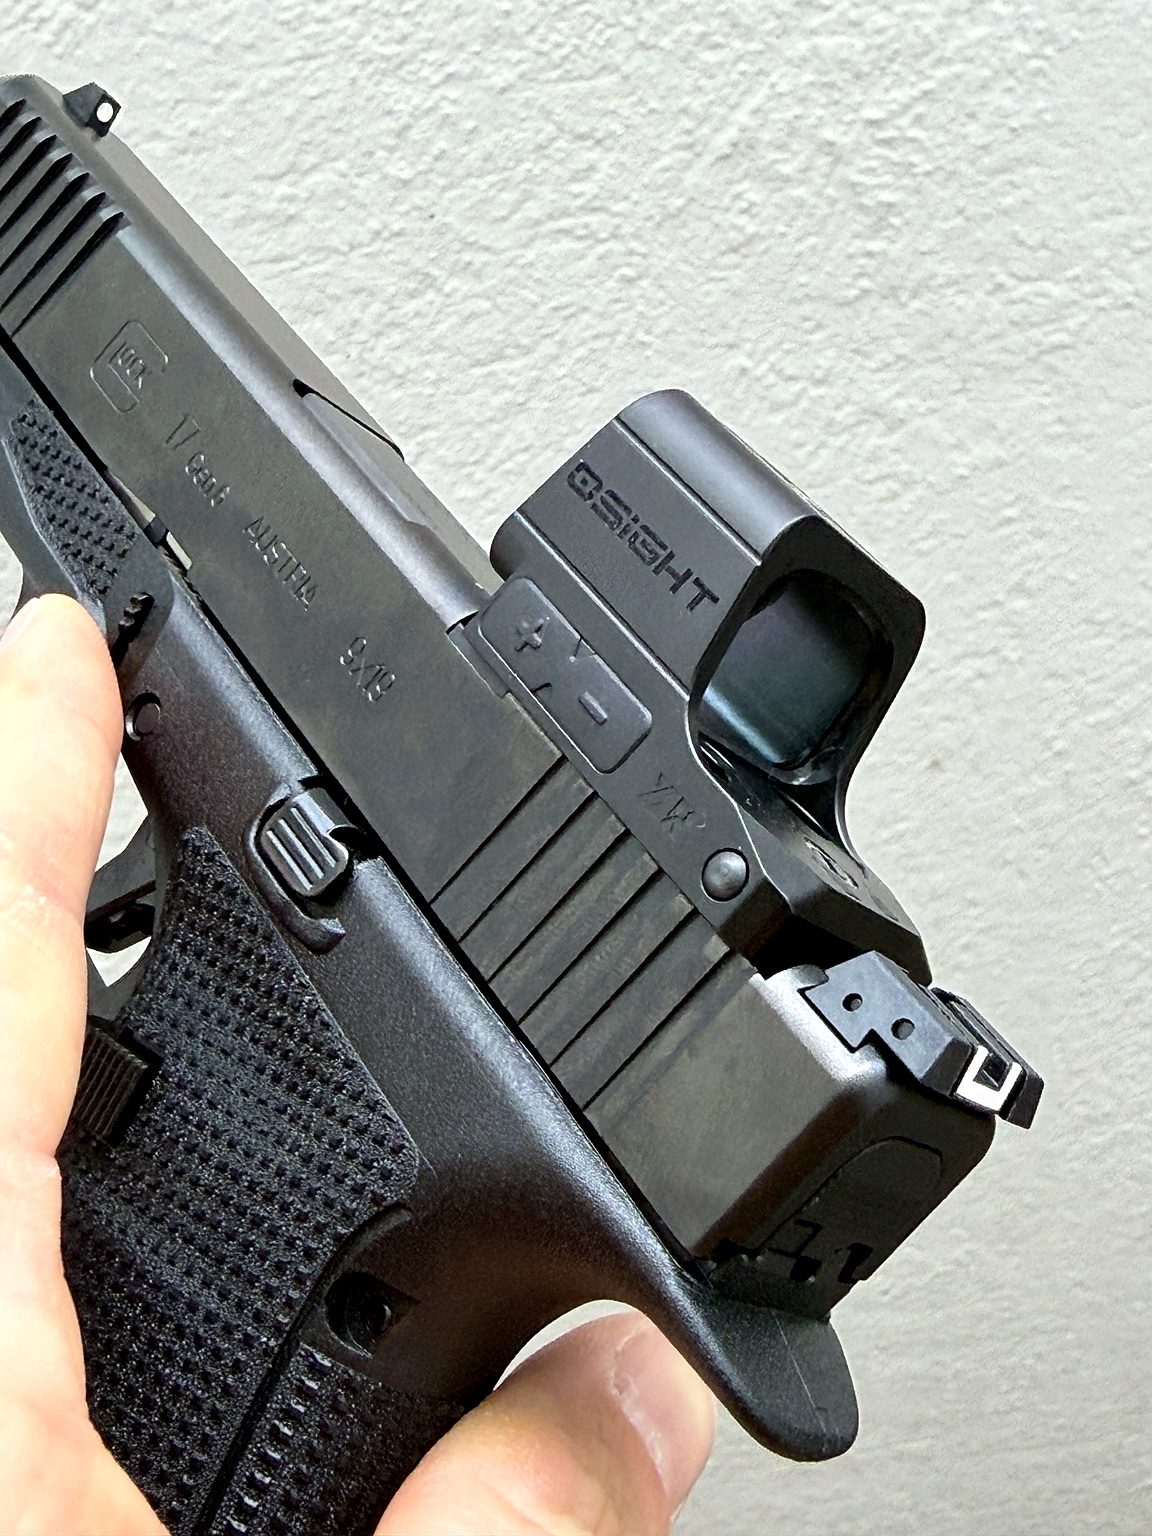
However, my Glock’s original factory rear sight remains installed behind the XR.
Therefore, the white U-shaped sight visible in the following photograph is the Glock factory rear sight, not the XR’s collapsible rear sight.
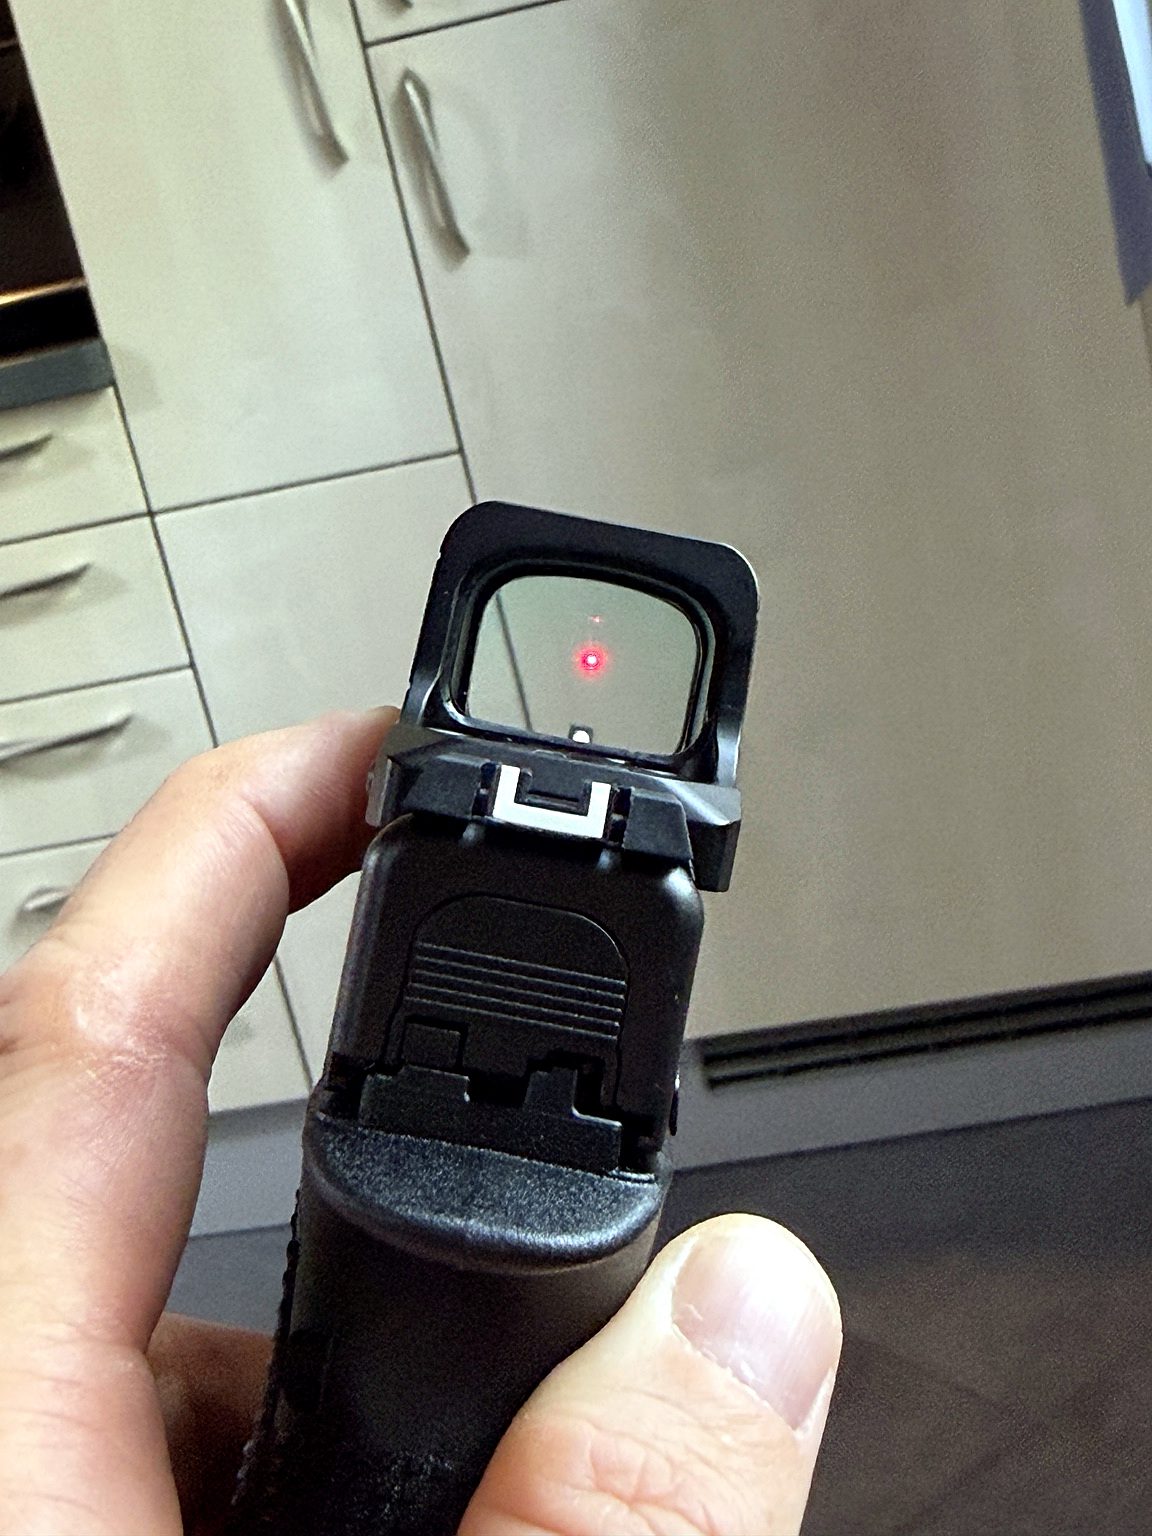
This photograph is intended to show the basic sight picture.
However, it should not be interpreted as proof of a particular co-witness configuration or zero.
Whether the mechanical sights and red dot correspond correctly in actual use will be checked at the range.
Likewise, the XR’s integrated backup sight still needs to work with the height and geometry of the front sight.
Ultimately, the point of impact has to be verified by shooting.
OSIGHT XR Technical Specifications
Here are the main published specifications for the OSIGHT XR.
Optic
| Design | Enclosed-emitter reflex sight |
|---|---|
| Magnification | 1× |
| Footprint | RMR pattern / 407C–507C pattern |
| Reticle colour | Red |
| Wavelength | 660 nm |
| Window size | 23 × 18 mm / 0.91 × 0.71 in |
| Eye relief | Unlimited |
| Lens | Aspherical, multi-coated |
| Adjustment | 1 MOA per click |
| Windage adjustment range | ±45 MOA |
| Elevation adjustment range | ±45 MOA |
Reticle System
| Reticle options | 2 MOA dot, 6 MOA dot, 32 MOA circle, 2 MOA dot + 32 MOA circle, 6 MOA dot + 32 MOA circle |
|---|---|
| Brightness levels | 11 |
| Daylight settings | 8 |
| Night-vision settings | 3 |
| Brightness memory | Yes |
Construction
| Housing | CNC-machined 7075-T6 aluminium |
|---|---|
| Finish | Type III hard anodising |
| Water resistance | IPX7 |
| Published drop resistance | 1.5 m |
| Length | 48.7 mm |
| Width | 30 mm |
| Height | 29.5 mm |
| Weight including battery | Approx. 48 g / 1.69 oz |
Battery
| Battery | Internal rechargeable lithium-polymer battery |
|---|---|
| Capacity | 89 mAh |
| Voltage | 3.87 V |
| Energy | 0.344 Wh |
| Maximum published runtime | Up to 54,000 hours using the 2 MOA dot at brightness level 4 under the manufacturer’s specified conditions |
Magnetic Charging Cover
| Battery capacity | 800 mAh |
|---|---|
| Voltage | 3.87 V |
| Energy | 3.1 Wh |
| Charging connection | USB-C |
| Approx. optic charging time | 1.5 hours |
| Approx. cover charging time | 2.5 hours with a suitable 5 V / 2 A power supply |
| Dimensions | 51 × 36 × 42 mm |
| Weight | Approx. 55 g / 1.94 oz |
| Water resistance | IPX4 |
Integrated Backup Sight
CBRS – Collapsible Backup Rear Sight
The system is integrated into the optic housing and can be deployed when required.
OSIGHT XR on Glock 17 Gen6: First Impression
At this stage, I deliberately do not want to call this a full review.
It isn’t one yet.
So far, I have unpacked the OSIGHT XR, examined its features and installed it on my Glock 17 Gen6 in 9 mm Luger.
Overall, my first impression of the installation is very positive.
Most importantly, the combination of the XR’s RMR footprint, Glock’s Gen6 Optic Ready system with plate 02, and the supplied #6-32 screws made the installation remarkably straightforward.
In addition, the XR brings several features to the pistol that I am genuinely interested in testing rather than simply listing from a specification sheet.
- Enclosed emitter
- Selectable 2 MOA and 6 MOA reticles
- 32 MOA circle options
- Motion activation
- Magnetic charging without removing the optic
- Integrated collapsible backup rear sight
Then it is time for the part that actually matters.
Next: OSIGHT XR Range Test
The next step will be a proper live-fire test.
In particular, I want to look at zero retention, visibility of the different reticles, handling during faster shooting, brightness settings, the practical value of the motion sensor and the charging system.
Furthermore, I am interested in how the OSIGHT XR behaves after considerably more rounds have gone through the Glock 17 Gen6.
Nevertheless, the final verdict has to wait until the optic has been tested properly on the range.
Now it has to prove itself on the range.