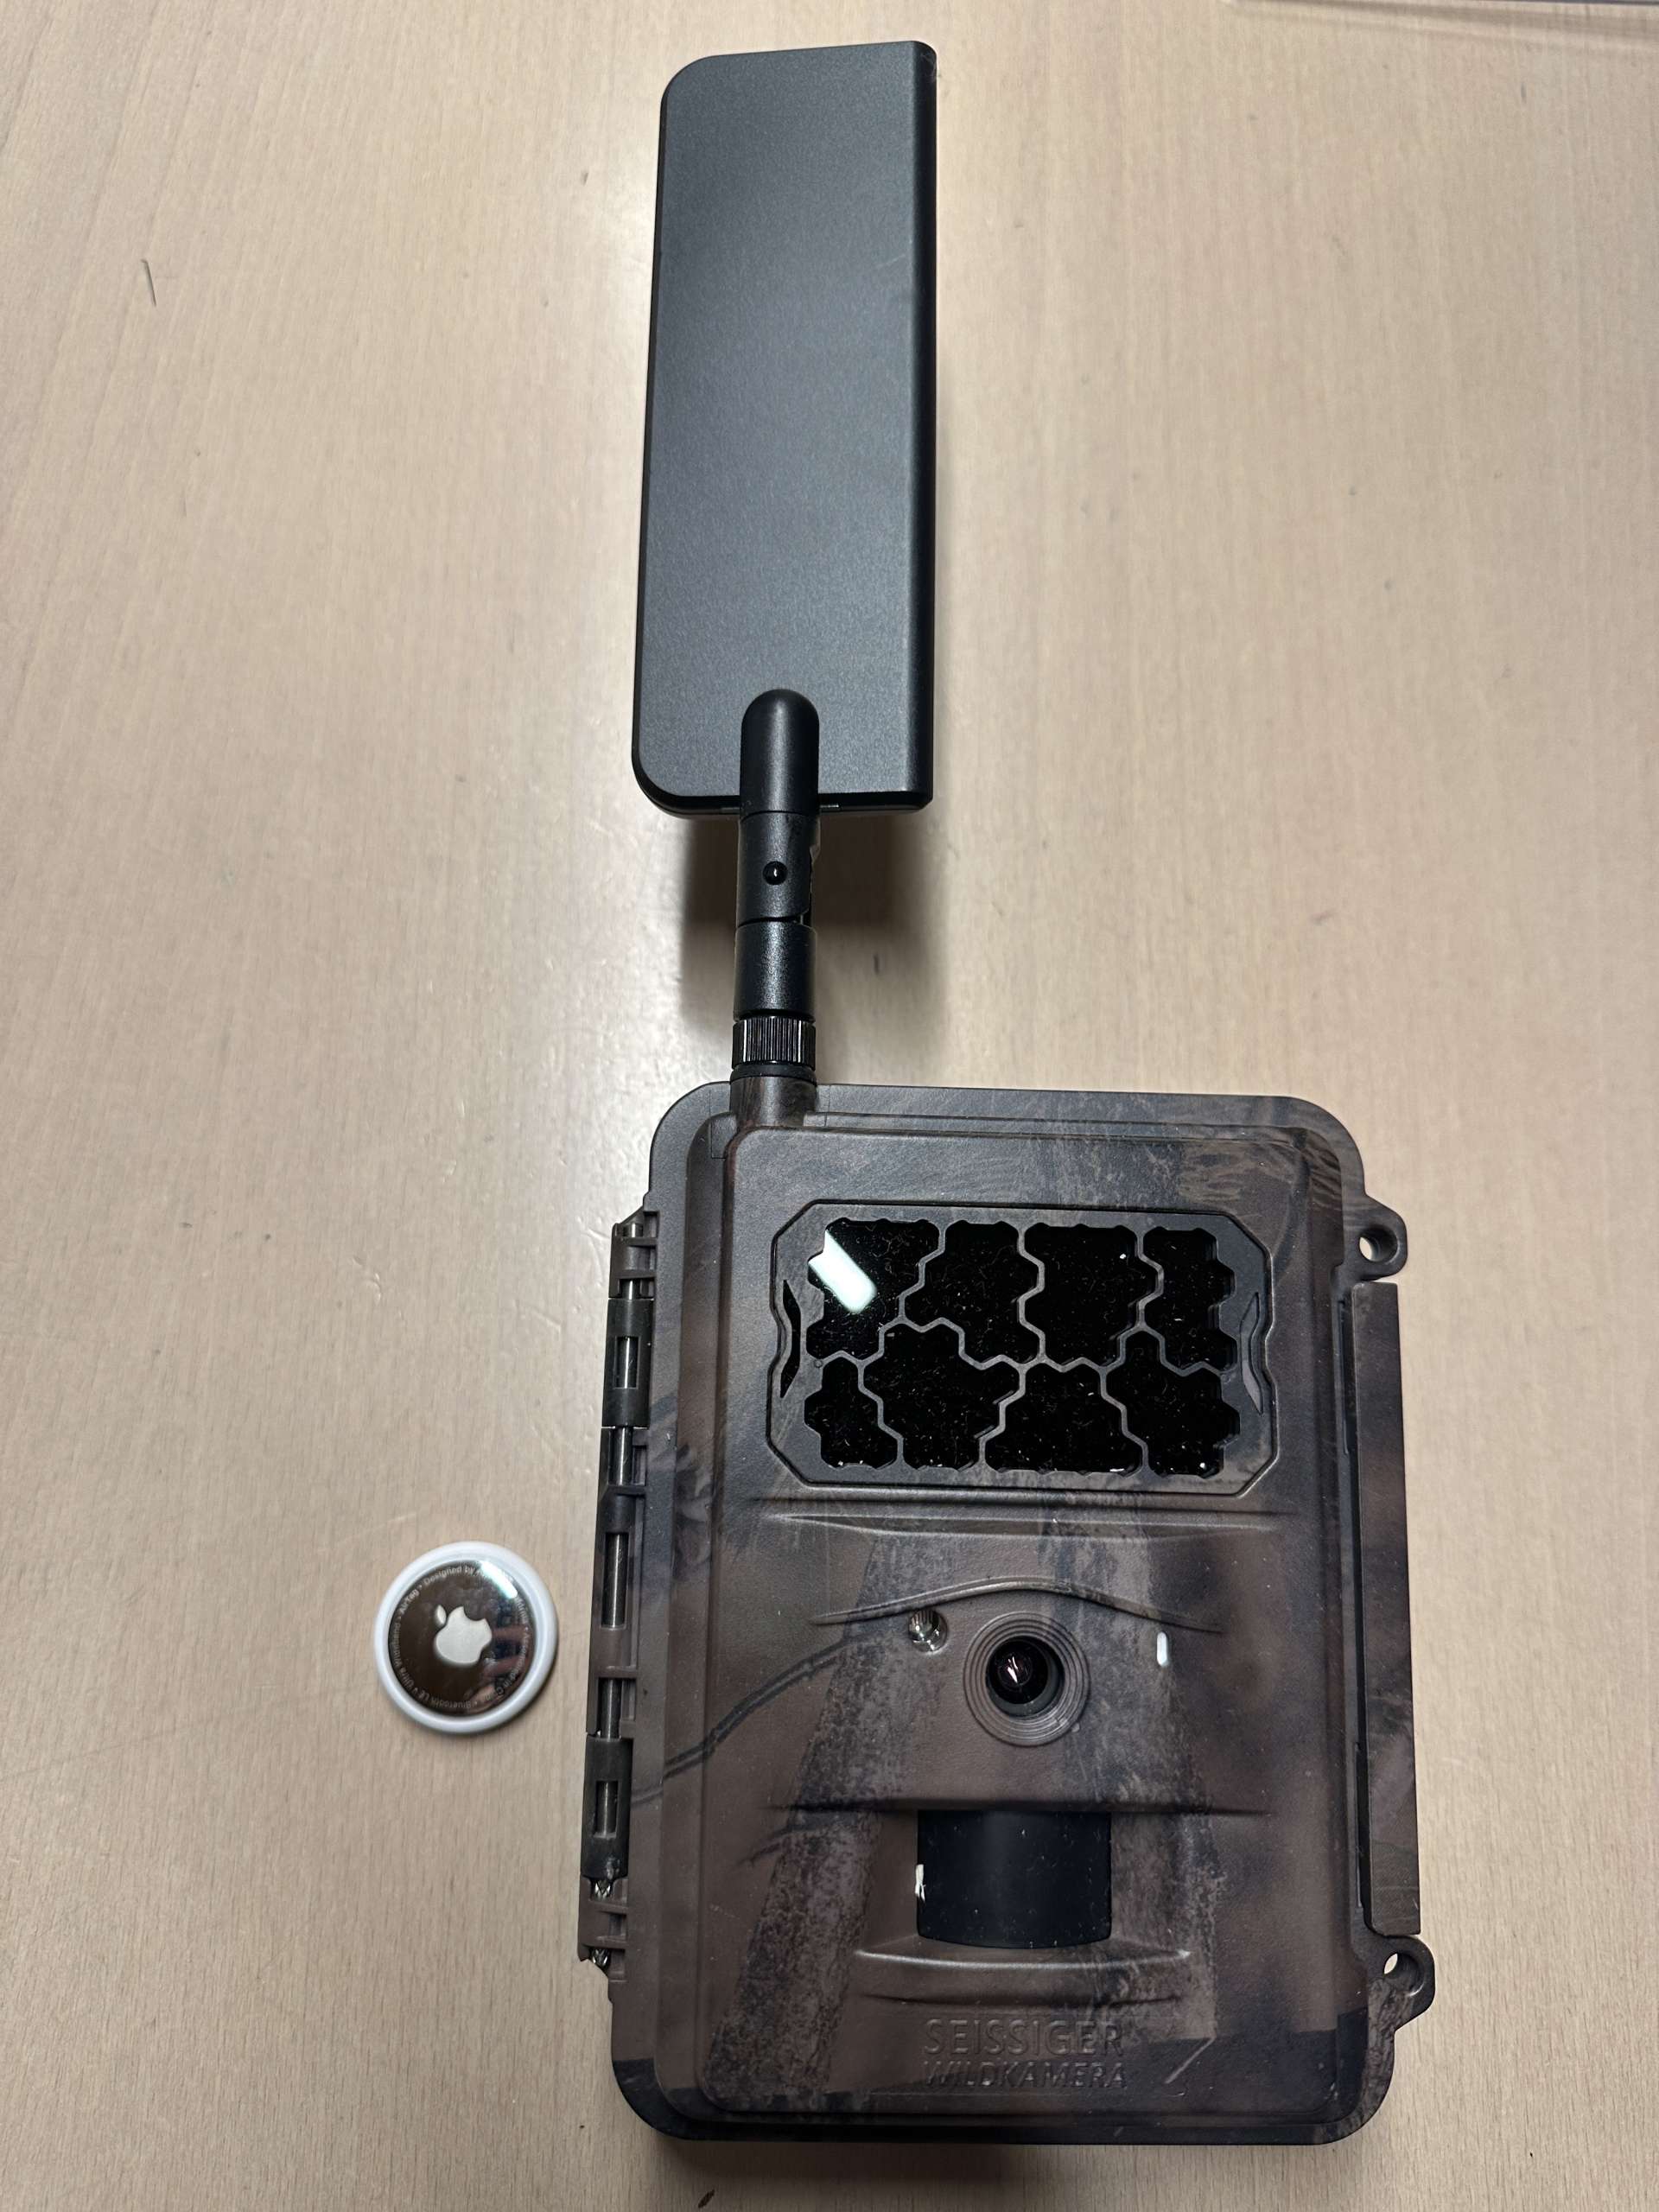
An Apple AirTag is to be installed in the Seissiger wildlife camera Special-Cam-LTE - SUPERSIM-Edition to ensure that the camera can be found again if it is lost or stolen. The requirement is that the AirTag is not simply plugged into the housing and could thus be easily removed by an unauthorized person. So the AirTag has to be installed inside the case. Because the entire camera was built very compactly, we have to place the AirTag between the boards. This isn't rocket science, but to do this safely without permanent damage, a few precautions must be taken.
Please note the following steps:
- clean workplace
- enough light
- Good tools (small Phillips screwdriver) and slotted screwdriver or tweezers to disconnect the cable connector of the two halves of the circuit boards
- Avoid static charging (e.g. work with gloves)
- Adhesive tape around the AirTag only serves to prevent it from flying around in the case and jingling (shock absorption) and would not represent a conductive bridge (insulating layer)Step 1: Unscrew the antenna
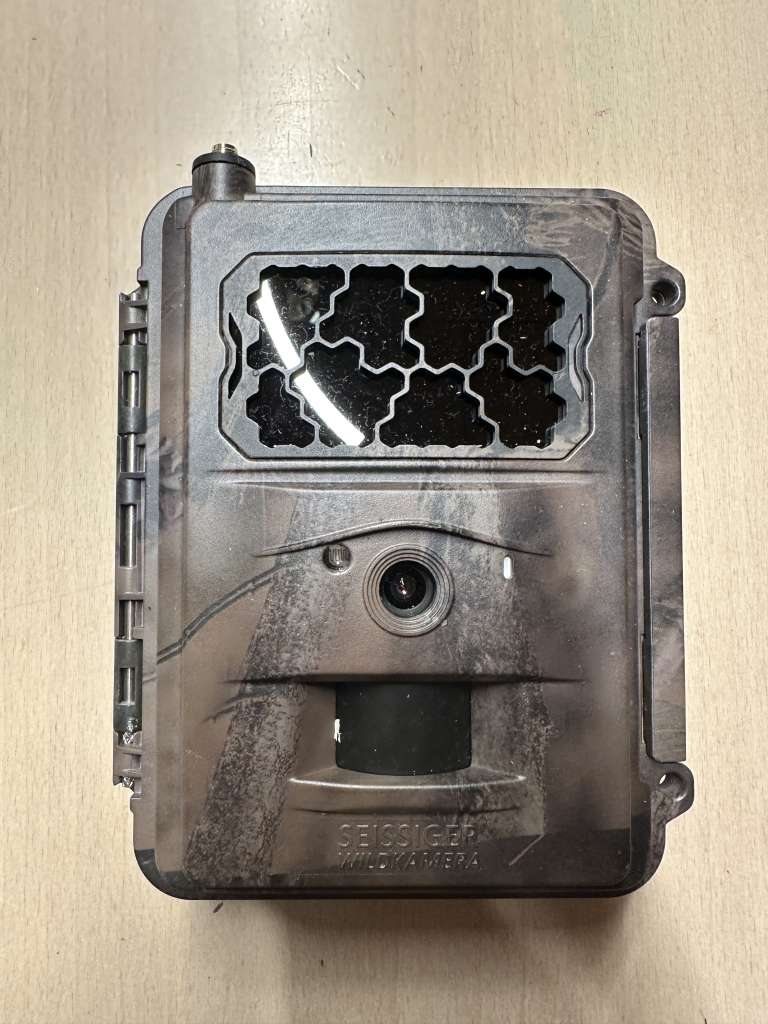
Step 1: Unscrew the antenna
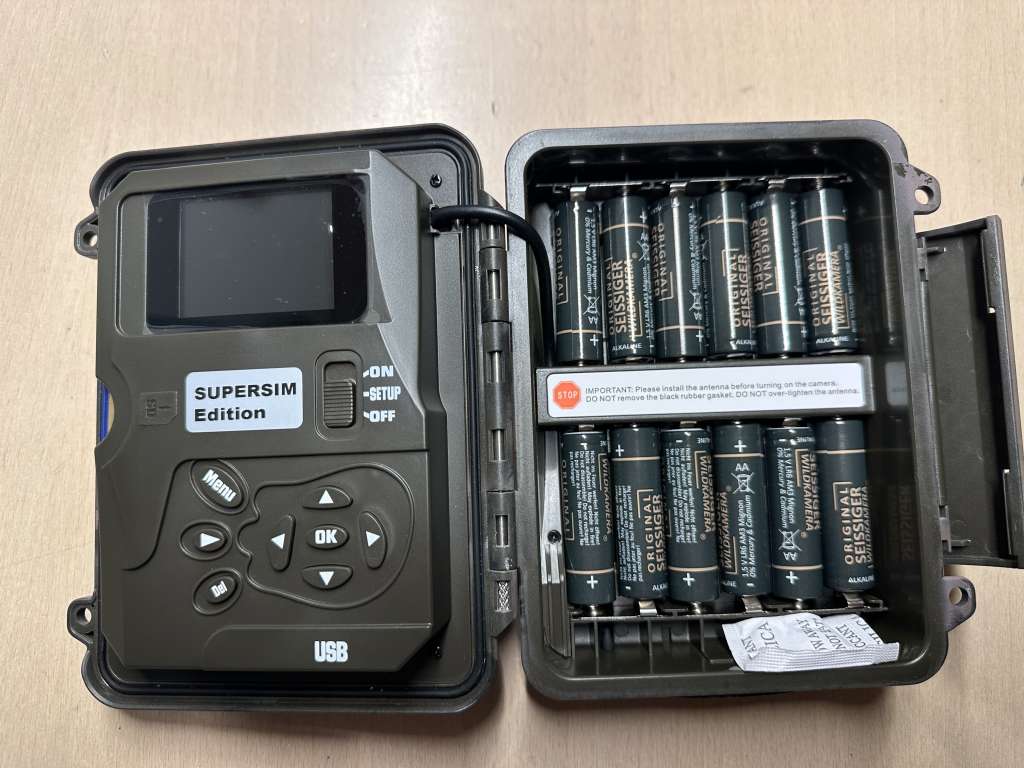
Step 2: Remove Batteries
Step 2: Remove Batteries
Step 3: Remove SIM card and memory card
Step 3: Remove SIM card and memory card
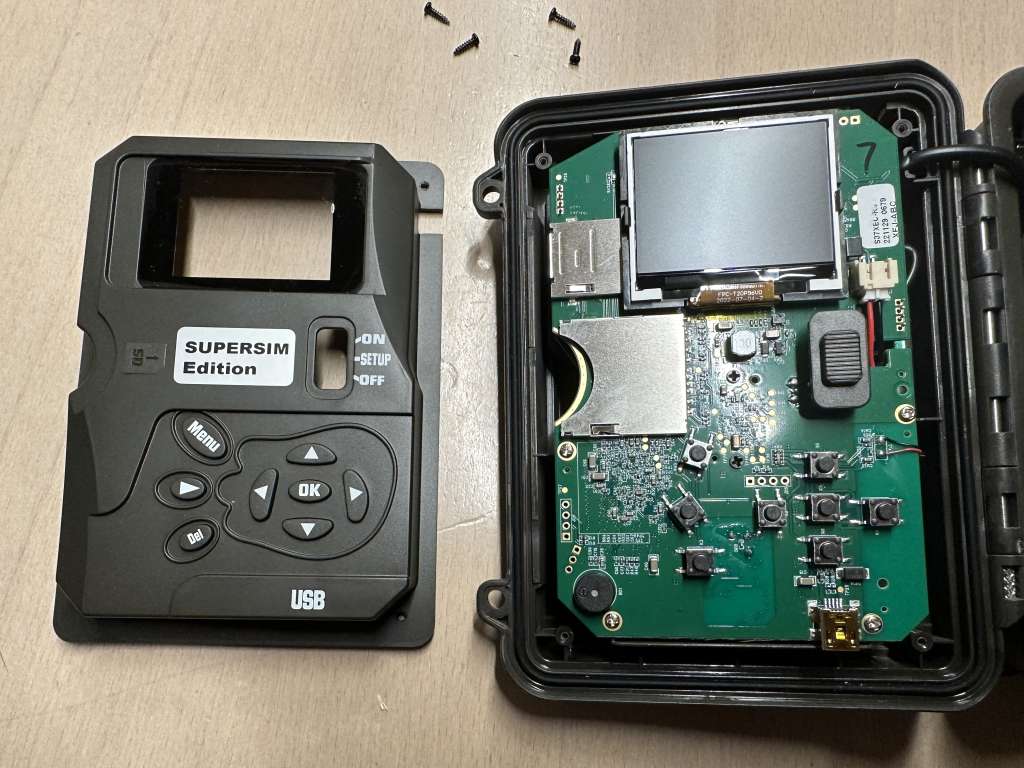
Step 4: Remove 4 black screws from each corner
Step 4: Remove 4 black screws from each corner
Step 5: Carefully lift off the cover
Step 5: Carefully lift off the cover
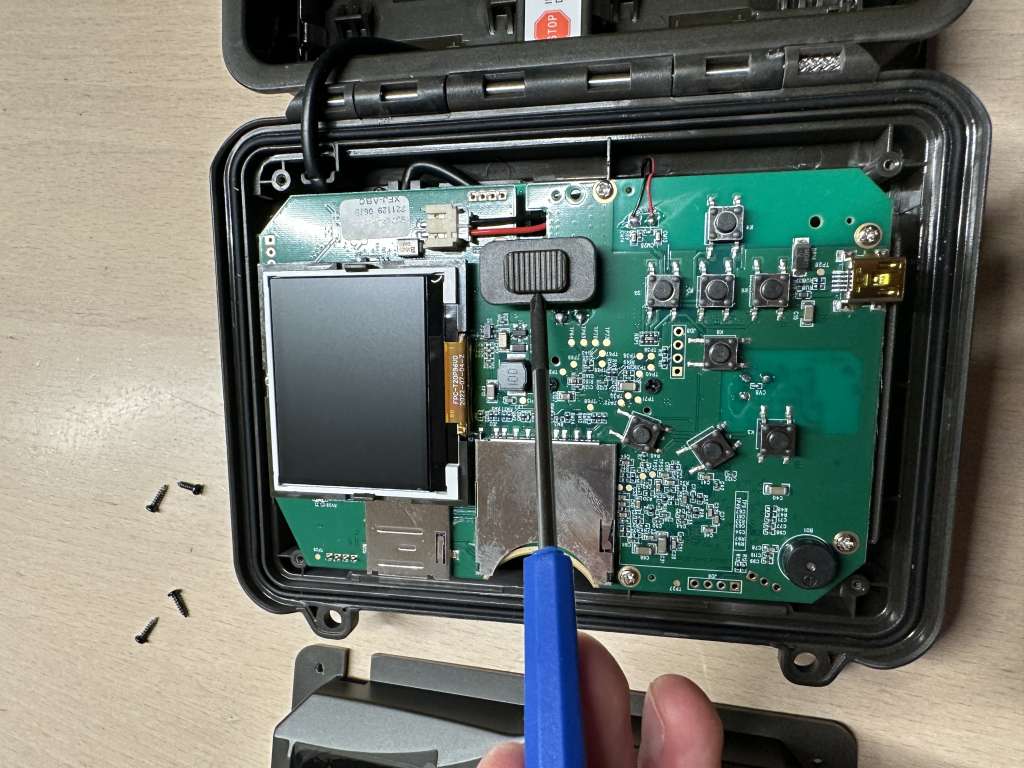
Step 6: Remove switch
Step 6: Remove switch
Step 7: Remove the 5 silver screws from the circuit board (located on the edge)
Step 7: Remove the 5 silver screws from the circuit board (located on the edge)
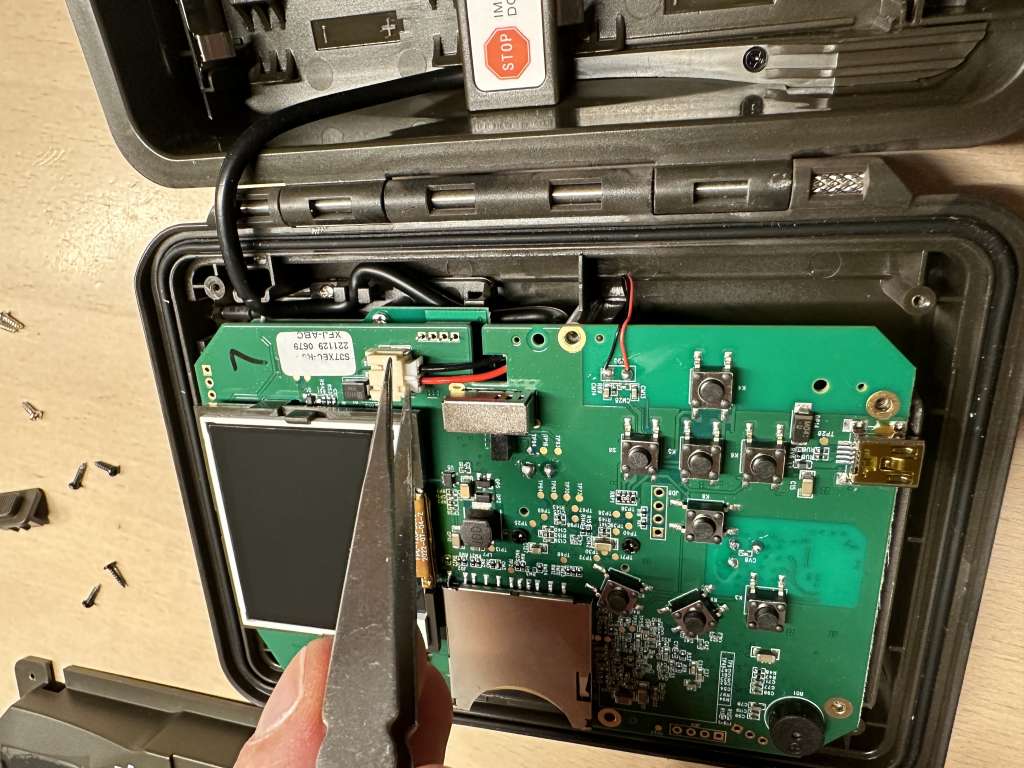
Step 8: Disconnect the cable connector
Step 8: Disconnect the cable connector
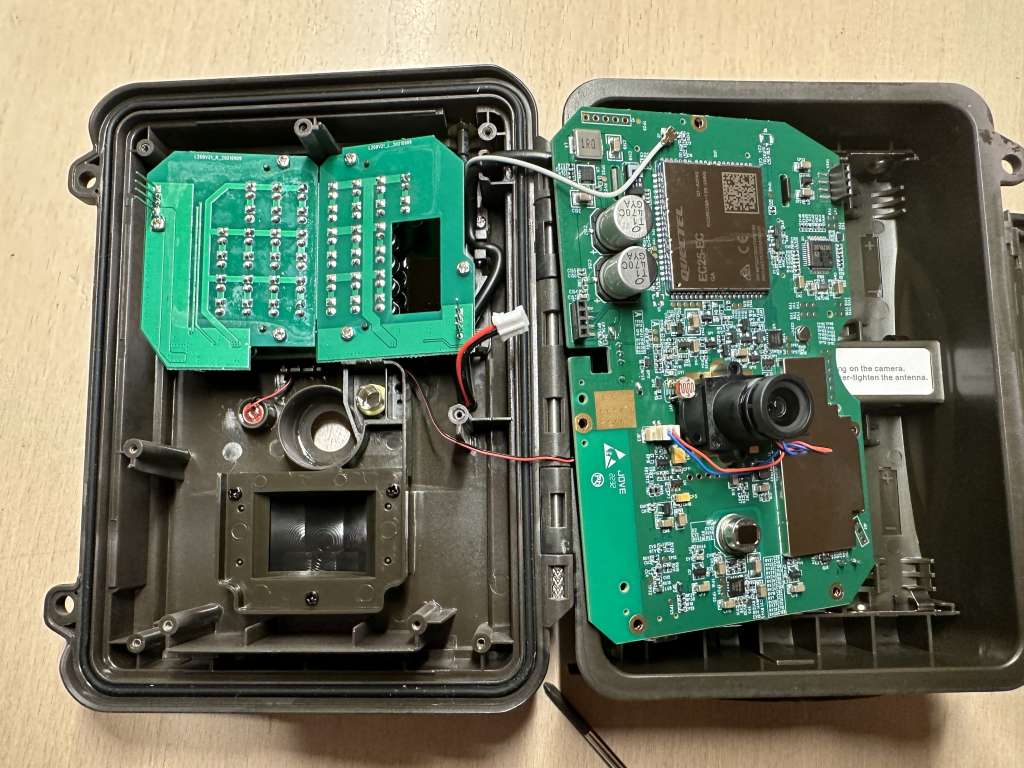
Step 9: Pull the circuit board straight off and put it to one side (ATTENTION: left and right one 4-pin plug each. Lift the circuit board straight up!)
Step 9: Pull the circuit board straight off and put it to one side (ATTENTION: left and right one 4-pin plug each. Lift the circuit board straight up!)
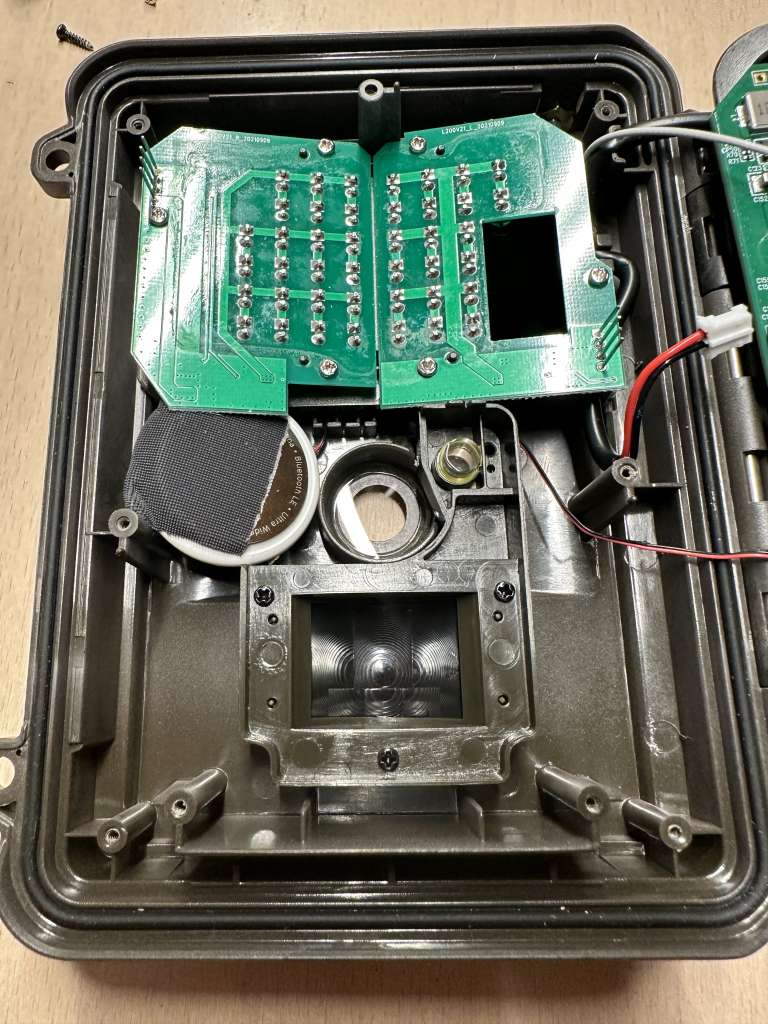
Step 10: Wrap AirTag with tape
Step 10: Wrap AirTag with tape
Step 11: Attach the AirTag to the location shown without tension! It shouldn't lie loose inside either!
Step 11: Attach the AirTag to the location shown without tension! It shouldn’t lie loose inside either!
Step 12: Screw everything back together!
Step 12: Screw everything back together!
That's it! Author: Michael Paa PS: I am looking forward to your feedback!